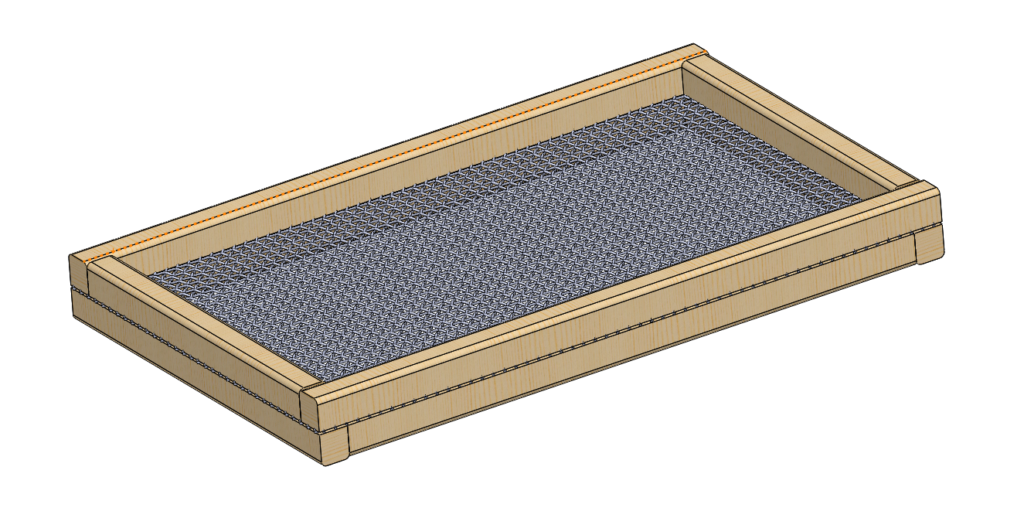
Soil texture improves dramatically when you remove all the rocks and roots. I built a rugged soil sifter to clean my compost before putting it on the garden, and now I find myself using it all the time.
After building it, I did a quick search and didn’t see anyone online building one like this, both rugged, easy and affordable. For that reason I drew up a building plan that I’m offering to you for free.
The chickens do an amazing job making compost, but in my setup they also scratch surrounding debris (like wood chips) back into the piles as they get worked.
To fulfill my dream of sinking my hands in that loose, soft, fluffy compost I built a soil sifter.
My requirements were that:
- I needed to build it quickly.
- I wanted to use material I already had.
- It had to be rugged.
- It needed to be compatible with my wheelbarrow.
I’ll confess I did no research at all prior to building it. The idea bounced around in my head for a while and then the time came when I needed a sifter. So I built one.
DOWNLOAD THE FREE BUILDING PLAN HERE
Now I Use It All the Time
I’m surprised by how often I reach for the sifter now that I have one. The quality of the compost (and soil) is so much nicer after getting sifted, it just makes me want to keep sifting.
In addition to sifting compost for the garden and for friends, I planted about 30 perennials this spring and prepared all the sites by digging a hole and sifting all the rocks and roots out of the soil before dumping it back in the hole.
One tip I read from Stark Brothers nursery is that it’s best to use the native soil where you plant perennials. I follow that advice and top dress the planting with compost and mulch.
Then I Researched it
I love my sifter so much that I asked Google what other people are using for sifters. There are plenty of ideas out there, but in my research I didn’t find one that combined ruggedness and ease of building in the same package.
Mine is rugged because I sandwich the whole screen between dimensional lumber. It’s not just stapled in there or held on with a baton. This is important because the weight of a few shovels of dirt with rocks, coupled with the sifting motion is quite a load. It seems, looking at other designs, like the use would tear apart many other sifters.
Some of the more complex designs seem cool, but I don’t want to take a weekend to build a sifter. I’m willing to allocate about an hour so I can get back to doing the job for which I am building the sifter.
How To Build It
I used material I had in the barn, but a 10 foot 2×4, some half inch hardware cloth, a staple gun and a handful of 3 inch(ish) screws is all you need.
DOWNLOAD THE FREE BUILDING PLAN HERE
I cut each piece to length and then split them lengthwise on the tablesaw.
You could split it first and then cut them to length, whatever works best for you.
See the plans for details, but the frame rigidity comes from the offset corners coupled with the top and bottom being screwed together around the whole perimeter.
The screen rigidity comes from being sandwiched between the lumber around the whole perimeter of the screen, plus it’s held in by the screws that are used to connect the top and bottom frame.
I’ve run a lot of soil through here and there’s no sign she’s ready to give up the ghost.
How to Use a Soil Sifter
Check out my video to see it in action, but all you do is set the sifter down over the top of a wheelbarrow, shovel the dirt on top, and then shake your money maker to get the small stuff to fall through.
After you’re satisfied, dump the remaining big material off to the side, or wherever you want it, and start all over.
Earth’s Gym Baby!
Go Screen Some Dirt
When not in use I hang it up by a hook in one of the corners of the sifter.
I hope you enjoy this quick and easy plan.
Please share with like-minded people and send me a picture, or shoot me some feedback when you build one.
DOWNLOAD THE FREE BUILDING PLAN HERE


